Search

Movement Across the Curriculum

60 minutes a day

Category

Grade 1

Jump & Spell

Movement Across the Curriculum Physical Education Blog_Page_23

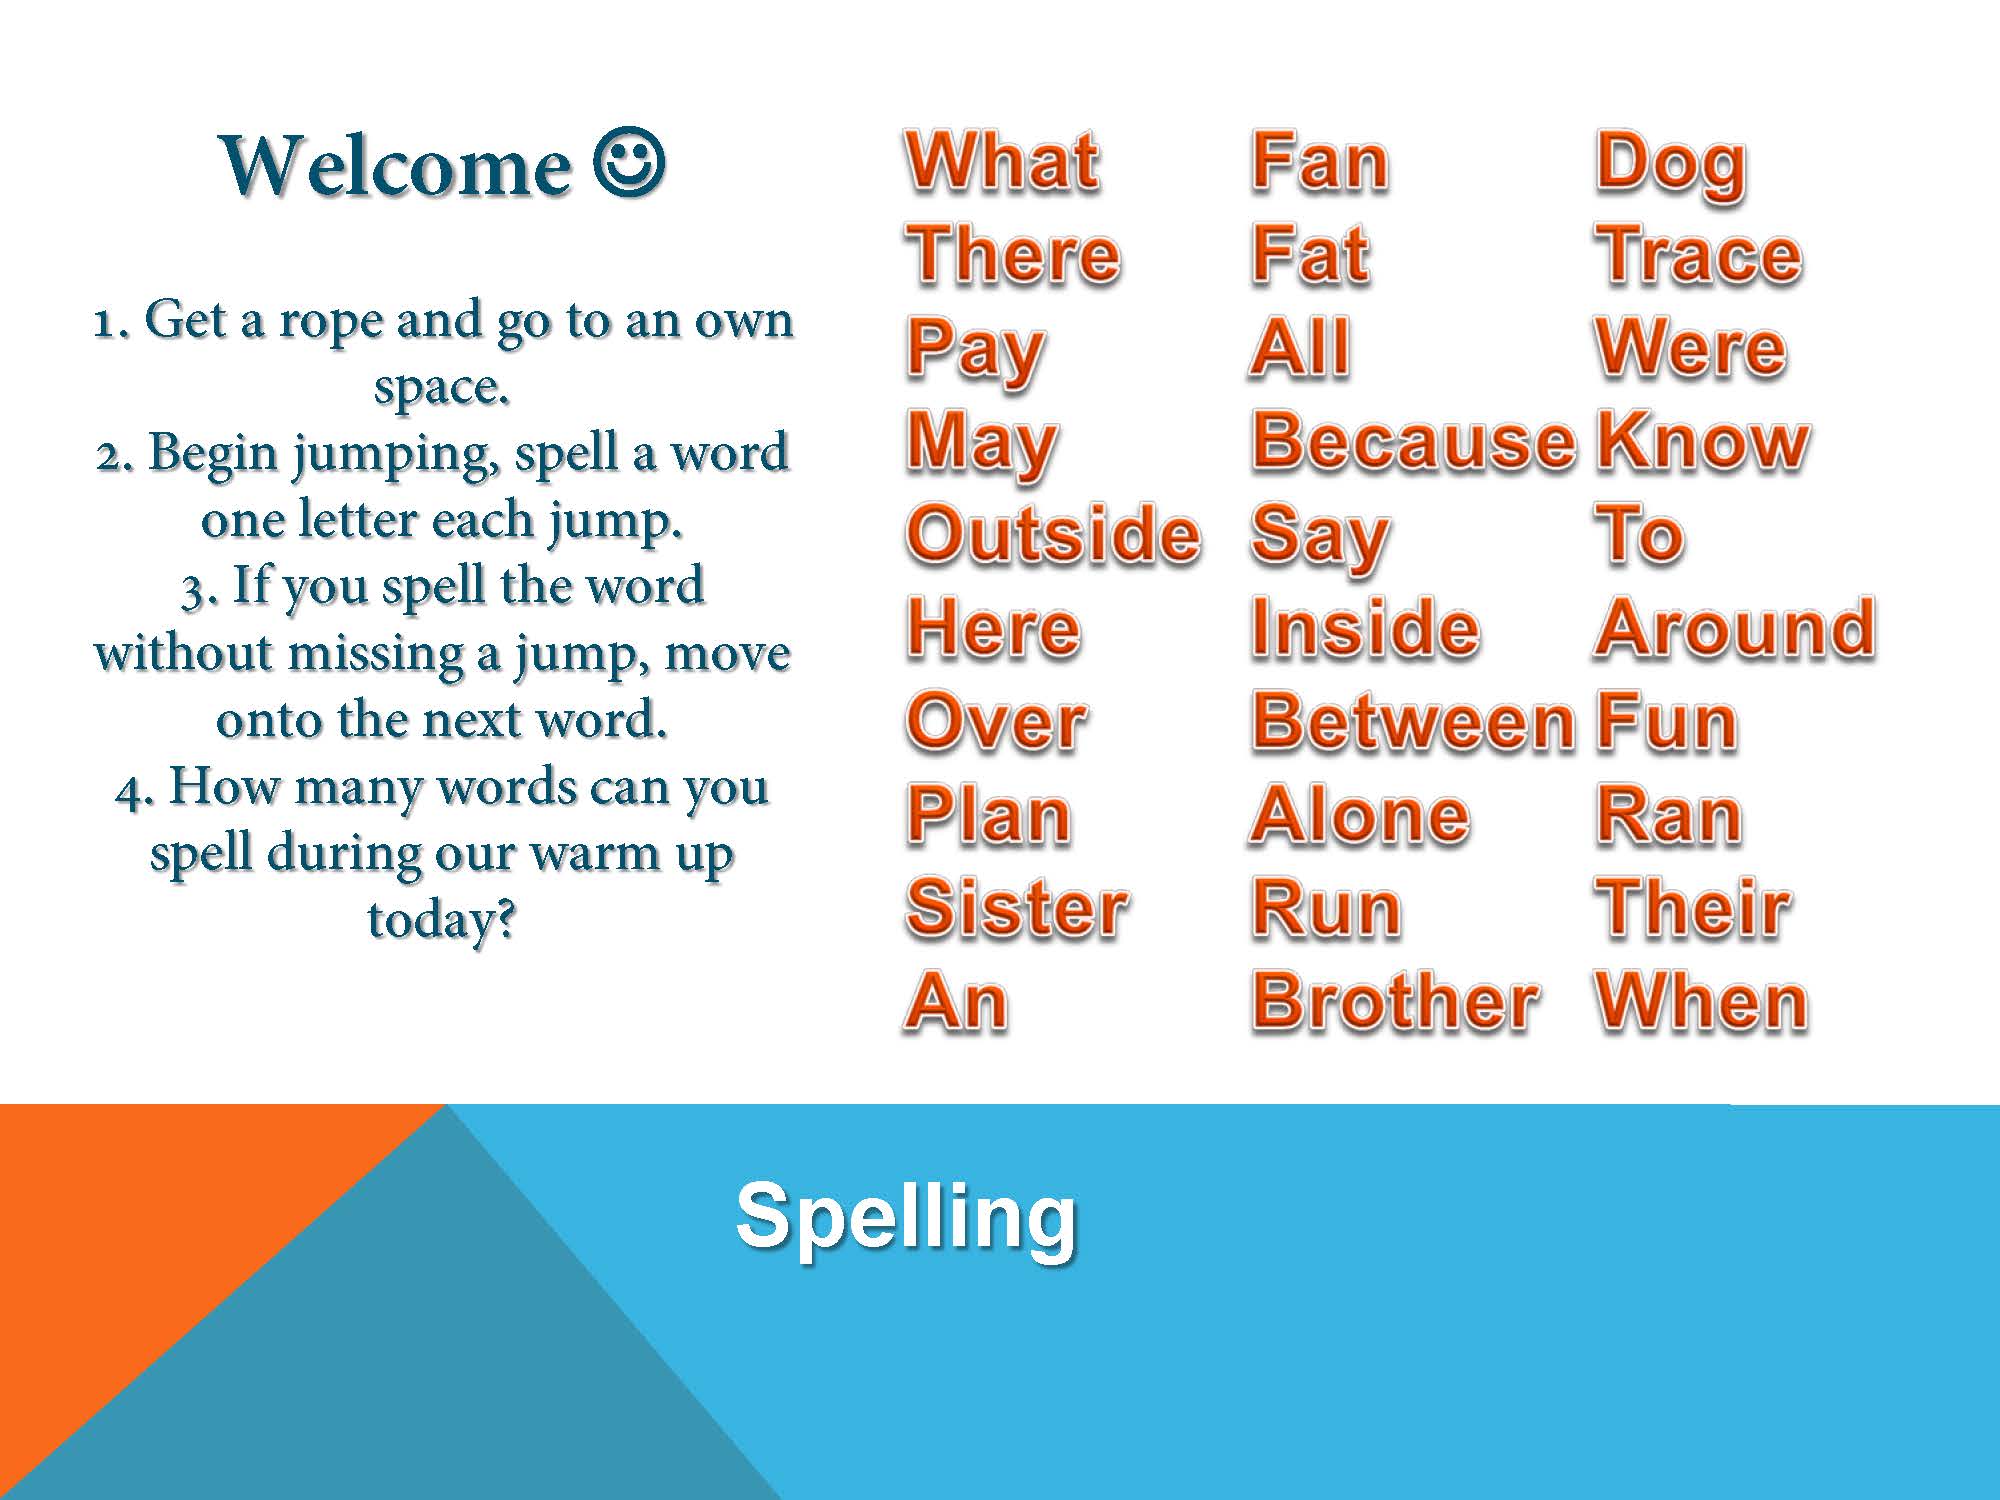
Physical activity is good for brain, feeding it Glucose & Oxygen all of which make easier for Children of all ages learn & memorize. This is a warm up I used for my second grade a couple years ago.  Mr. Casey, the second grade teacher, was telling me that the class was having a difficult time with spelling in general.  I started warming the class up with jumping rope while they individually spelled the spelling words as a warm up; and Mr. Casey began working on spelling in the classroom immediately follwoing physical education.  I checked in with Mr. Casey each morning I taught the second grade, got the spelling words and then posted them on a PowerPoint slide or if we were outside, on a big white board.  The second grade actually performed the best, on average, of any class Mr. Casey had in his years of teaching!

More Rhythm and Spelling activities from: http://www.momto2poshlildivas.com/2012/10/75-fun-ways-to-practice-and-learn.html

  • Hula Hoop and spell words out loud.
  • Hopscotch Spelling – Write letters outside in chalk or play indoors with large letter cards on floor. Hop from letter to letter to spell words.
  • Bounce a Ball – bounce a ball as you spell words – 1 bounce per letter.
  • Balloon Bop – keep a balloon up in the air while spelling your word. This one gets lots of giggles.
  • Froggy Spelling – leap like a frog and spell words – 1 letter for each leap.
  • Jumpin’ Jack – do jumping jacks as you spell words – 1 jump per letter
  • Hop & Spell – hop on one foot as you spell words, this is a great exercise in balance especially with longer words.

Shipwreck

Movement Across the Curriculum Physical Education Blog_Page_05

This game is a great grouping strategy.  You can use it as a brain break, 5 minutes of movement doing the different commands.  End the game in the group configuration you want them in to begin the next activity.

It can also be used to reinforce vocabulary within a variety of concepts. Below are examples of “shipwreck” like activities. Classroom teachers can use this idea for grouping as well as a 5 minute movement break.

Explain the 5 different groupings and what they mean, to the children.  Introduce one at a time and then let them practice.  I usually start with Ocean/Shore.  That way they get moving right away and then I mix that in with the next configuration.  Surf’s up is usually second because it also get the class to freeze. 🙂

After they have learned and practiced all the commands, begin playing the game.  The objective it to try to be in a group with everyone at least once during the game.  Speed makes the game more fun, but in the beginning, I encourage them to all get in a group.

  • Ocean/Shore (single) – Run or travel however directed toward the shore side or the ocean side of the space. use something to help the children remember which side is which!
  • Surfs Up (single) – Freeze in your spot and ride the wave!
  • Person Overboard (partners) – One person is on hands and knees, the other partner stands next to them looking from side to side as if searching for the person overboard.
  • Light House (Trio) – Two people hold hands forming the light house, the third person stands in the middle of the hands (light house)) spinning around, blinking the light. (hands opening and closing)
  • Shark (Five) – Five people seated, feet touching around the circle, to make a protective raft safe from the shark.

You can make any kind of configuration you want to make different groupings.  we use “Raft” to get groups of four.  Four people laying on their stomach making a square raft.


Dice and Cones


Use this video to show give your visual learners an example.

  • Concept being Used:   Directional (Forward, Backward and Sideward) movements
  • Prerequisites: Prior learning of Directional movements, counting to at least 12.
  • Materials needed: 12 Control Cones; large foam dice.

Have students place a traffic cone upright on the floor in own spaces around the general space. Prompt them to keep cones away from wall and center (meeting circle) area. To begin the activity, review the different directions (Forward, Backward and Sideways) they can move; while walking, jog/running, hoping, skipping, sliding, traveling on bottom, etc.). Explain that you will be rolling the die you have in your hand. They will all call out the number together, and then they can go and travel using the direction that is determined, to move to that number (the number of the dice) of cones. They should touch the top of each cone they come to; when they are done, they then perform the movement back to the center circle. Change the direction you call out. You can also have students roll the die. Encourage the students to find many ways of traveling using the different directions.

Alternate Tasks:

  • Allow the students to choose the direction they will use to travel to the cones.
  • Have the students choose a different direction to use each time they go to another cone.
  • Have the students in small groups, (groups of six using flag colors) each with their own dice.  These groups can decide together which direction they will use while traveling each time to the cones.  In this case the students can use the control cones as a class, even though they will be doing the activity as a group of six.

Assessment Ideas:

  • As the children travel, watch to see they are using the correct direction.
  • When they task allows the children to choose the direction, ask them to tell you what direction they are traveling in, as they travel.

Adaptations for Students with Disabilities:

  • Have students move in a way they find easiest to that number of cones.

Travel/Stop with emphasis on Directions (Forward, Backward and Sideways)

This movement activity provides almost 4 minutes of organized movement.  Use this video to practice the three Directions; traveling forward, backward and sideways.  The music plays with the surface of the body that represents the direction to travel, up on the screen.  When the music stops, the stop sign pops up, and the children should stop and look for the next direction to use when the music begins again!  The new direction will show up 5 seconds before the music starts again.  Make sure the children wait to travel until the music begins again.  Use the 5 seconds to talk about how the students might travel in the new direction.

You can travel through the children as they move, making sure they are traveling in the correct direction.  You can also use that time to point out the different body parts that are leading as the children travel!

This is also a wonderful formative assessment tool for assessing the Head Start Outcome;

Gross Motor Skills – The control of large muscles for movement, navigation, and balance.

  • Understands movement concepts, such as control of the body, how the body moves (such as an awareness of space and directionality), and that the body can move independently or in coordination with other objects.

Pete the Cat goes for a Walk

After reading the story “Pete the Cat; I Love My White Shoes” and teaching the concept of “Walking” I used this video to practice walking, color identification, empathy and listening.  It’s the author and a musician, reading and enacting the story. You can also see it on YouTube @ http://www.youtube.com/watch?v=nUubMSfIs-U

Anytime the story is being read, or the song is being sung, everybody walks around the room.  When Pete steps in the various puddles and piles of stuff, we all stop and say “Oh No” and then when Pete starts singing and walking again, so do we!

Teaching Tips

  • Move with the children, complimenting those who move safely, avoiding other students.
  • Encourage the children to move to open spaces as they walk around the room space.
  • If you have taught directions (forward, backward and sideways) then encourage them to walk in the different directions as they travel through the room space.

Body Part Identification – Travel/Stop Musical Spots

PPT Musical Spots

This movement activity that will provide 10 minutes of movement time!  The PowerPoint presentation provides visual and audio cues for your children to listen to and watch for as they travel through the classroom when the music plays, and put the identified body part on the vinyl spot when the music stops!  Listening skills and body part identification are among the many skills and concepts being practiced.  Use the time that the children are putting the body part on the vinyl spot to formatively assess the children’s ability to identify and locate the correct body part.

Teaching Tips

  • Make sure the children stop traveling when the music stops.  Even if they don’t go to a spot, they should all stop traveling.
  • Help children identify the correct body part, make sure they put the correct body on the vinyl spot.  You may have to call out the body part to help some children know which part to use.
  • Remind the children to look at the screen when the music stops.  That is how they will know which body part to use.

Blog at WordPress.com.

Up ↑